10 Water Heater Problems and Fixes, Troubleshooting, Maintenance, and Replacement Guidance
Rakeman Plumbing helps homeowners and businesses keep hot water dependable, safe, and efficient. Water heaters work hard every day, and most problems start small, a little noise, a slow recovery, a slight temperature change, then grow into leaks, outages, or high energy bills. This guide covers 10 common water heater problems, practical fixes, step by step troubleshooting, and maintenance and replacement guidance. Use it to decide what you can safely check yourself and when it is time to call a licensed plumber.
Before you troubleshoot, quick safety checks
- Shut off power or fuel first. For electric heaters, turn off the breaker. For gas, set the gas control valve to OFF before you remove any access panels. Let the burner area cool.
- Know the scald risk. Water above 120 F can burn skin quickly. Keep thermostat settings conservative, especially with kids or older adults.
- Never cap a relief valve discharge. The temperature and pressure relief valve is a critical safety device, the discharge pipe should terminate safely near the floor and remain unobstructed.
- If you smell gas, stop. Do not operate switches or ignition. Leave the area and contact your gas utility and a professional.
- When in doubt, call a pro. Combustion, venting, and pressurized hot water can be hazardous, and some repairs require permits.
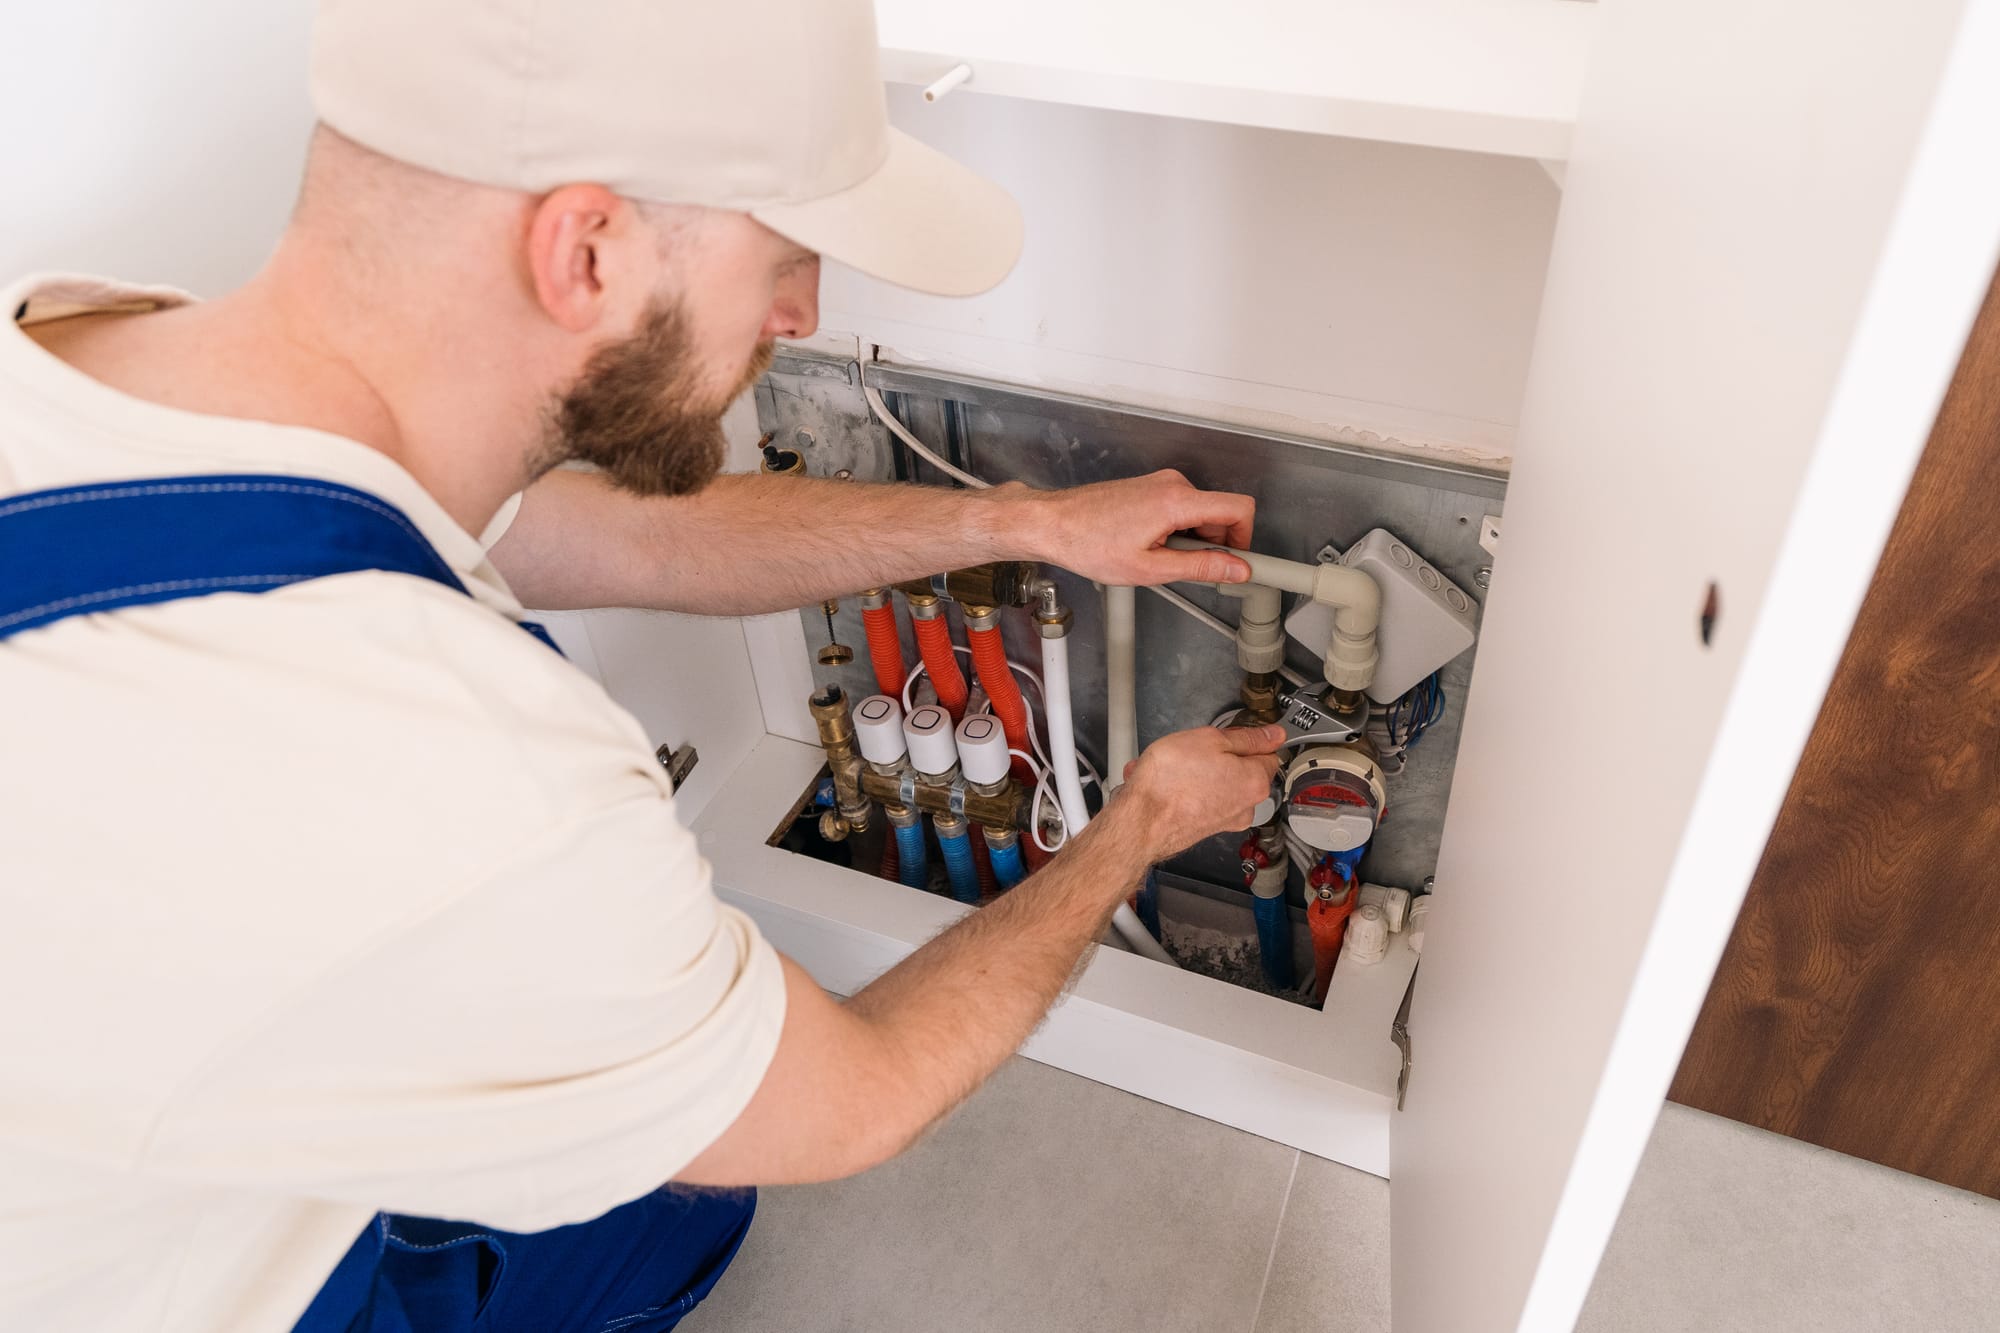
How to identify your water heater type
- Storage tank gas. Has a burner compartment at the bottom, a vent pipe, and a gas line with a control valve.
- Storage tank electric. No vent, has two access panels on the side for upper and lower elements and thermostats.
- Tankless gas. Wall mounted unit with intake and exhaust, usually has a digital display, requires periodic descaling.
- Heat pump water heater. Looks like a tall tank with a fan on top, often in a garage or utility room, needs airflow and condensate drainage.
10 Water Heater Problems and Fixes, Troubleshooting, Maintenance, and Replacement Guidance
1) No hot water at all
This is the most disruptive issue and can come from a simple power interruption or a failed component. The troubleshooting path depends on whether the unit is electric, gas, tankless, or heat pump.
- Common causes, electric tank
- Tripped breaker or blown fuse
- High limit switch tripped
- Failed heating element, upper element often causes no hot water
- Loose wiring or burned connection
- Common causes, gas tank
- Pilot light out or ignition failure
- Gas shutoff valve closed
- Thermocouple or flame sensor issue
- Gas control valve failure
- Ventilation or combustion air problems
- Common causes, tankless
- Error code triggered by low flow, ignition, venting, or scale
- Clogged inlet water filter
- Insufficient gas supply, undersized gas line or regulator issue
- Frozen condensate line or blocked vent
What you can check
- Electric. Verify the breaker is ON. If it trips again quickly, leave it OFF and call a professional, a shorted element or wiring issue may exist.
- Gas. Confirm the gas shutoff is open and other gas appliances work. Check the status window on the control valve for pilot status. Follow the manufacturer lighting procedure only if you are comfortable and there is no gas smell.
- Tankless. Check the display for an error code, clean the inlet screen filter if accessible, and confirm adequate water flow by opening a hot faucet fully.
Fixes
- Reset high limit switch, electric. With power OFF, remove the upper access panel and insulation, press the red reset button on the upper thermostat if tripped, then restore power. If it trips again, schedule service, overheating can indicate thermostat failure or wiring problems.
- Relight pilot, gas. Follow the exact steps on the heater label. If it will not stay lit, the thermocouple, pilot assembly, or gas valve may need replacement.
- Repair or replace heating elements, electric. A failed upper element can stop all hot water. Testing requires a multimeter and correct shutdown and draining steps.
- Tankless service. Clear the error code cause, often cleaning filters, ensuring venting, or descaling the heat exchanger.
Maintenance prevention
- Test and document recovery performance yearly, slow recovery can signal element or burner issues before failure.
- Schedule annual professional inspection for gas venting and combustion safety.
Replacement guidance
- If a standard tank is over 10 to 12 years old and begins experiencing repeated ignition failures, element failures, or corrosion issues, replacement often makes more sense than continued repairs.
- If a tankless requires frequent descaling due to hard water and has expensive parts failing, consider adding water treatment or replacing with a model designed for your water conditions.
2) Not enough hot water
Running out of hot water faster than usual can be caused by demand changes, thermostat settings, sediment in the tank, or a failing component that reduces heating capacity.
- Common causes
- Thermostat set too low
- Broken dip tube, cold water mixes at top of tank
- Sediment buildup reduces effective tank volume and heat transfer
- One heating element failed in an electric tank, usually the lower element
- Gas burner dirty or underfiring
- Tankless unit undersized for simultaneous fixtures or restricted by scale
What you can check
- Thermostat setting. Many heaters ship at 120 F. If it was turned down, restore to 120 F to 125 F. Avoid higher settings unless needed and protected with mixing valves.
- Usage changes. A new rain shower, filling a large tub, or doing laundry and showers simultaneously can exceed capacity.
- Electric element symptoms. If you get a short burst of hot water then quickly cold, a lower element failure is common.
Fixes
- Flush sediment. Drain several gallons from the tank until water runs clearer. In heavy sediment, a full flush may be needed. If the drain valve is clogged, a professional can clear it and flush safely.
- Replace dip tube. If you see white plastic pieces in faucet aerators, the dip tube may be deteriorating. Replacing it can restore hot water volume.
- Replace failed element or thermostat, electric. Proper diagnosis with a multimeter ensures you replace the right part.
- Clean burner and verify gas pressure, gas. A technician can clean the burner, check manifold pressure, and confirm correct combustion.
- Descale tankless heat exchanger. Hard water scale reduces output and causes temperature swings. Annual descaling is common in many areas.
Maintenance prevention
- Flush 1 to 3 gallons monthly or quarterly, depending on sediment levels, and do a deeper flush annually.
- In hard water areas, install a water softener or scale reduction system to protect tanks and tankless units.
Replacement guidance
- If your household has outgrown the heater, consider a larger tank, a high recovery gas unit, a heat pump water heater for efficiency, or a properly sized tankless system.
- For chronic sediment issues on an older tank, replacement plus water treatment usually yields better long term results than repeated flushing.
3) Water is too hot or temperatures swing
Overheating and unstable temperatures can be uncomfortable and dangerous. Failures range from thermostat problems to cross connections and tankless flow issues.
- Common causes
- Thermostat set too high or miscalibrated
- Stuck thermostat or heating relay, electric
- Failed gas control valve regulating incorrectly
- Tankless unit short cycling due to low flow or clogged filter
- Anti scald mixing valve failed or scaled
- Crossover in plumbing, a single handle faucet cartridge allowing mixing
What you can check
- Confirm the actual temperature. Use a cooking thermometer at the tap after running hot water for a minute.
- Inspect thermostat settings. Electric tanks have two thermostats, make sure both are set to the same temperature.
- Check for a crossover. Turn off the cold supply to the heater, open a hot faucet. If water keeps flowing steadily, cold water may be crossing into the hot line through a fixture.
Fixes
- Lower and match thermostat settings. Set both electric thermostats to 120 F, then monitor.
- Replace faulty thermostat or gas valve. If overheating persists, do not keep adjusting. A failed control can create scalding risk and high pressure.
- Service mixing valve. Clean or replace thermostatic mixing valves that are scaled or stuck.
- Tankless flow and filter cleaning. Clean inlet filter, verify minimum flow rate is met, and descale if needed.
Maintenance prevention
- Test mixing valves annually if present, especially in commercial settings.
- Keep tankless filters clean and follow descaling intervals based on water hardness.
Replacement guidance
- If a tank is older and the control system is failing, replacement may be more cost effective than major control valve repairs, especially on gas models.
- If you need higher stored temperature for capacity, use a new heater with a listed mixing valve rather than turning the tank excessively hot.
4) Rust colored or smelly hot water
Discolored hot water or a rotten egg smell usually points to corrosion, bacterial activity, or reactions involving the anode rod. It is often treatable, but it can also indicate the tank is nearing end of life.
- Common causes
- Corroding anode rod, tank corrosion beginning
- Sediment and rust in the tank
- Bacterial growth producing hydrogen sulfide odor, often in certain water supplies
- Galvanic corrosion from mixed metals
What you can check
- Hot versus cold comparison. If only hot water is rusty, the heater is the likely source. If both are rusty, the issue may be incoming supply or pipes.
- Odor pattern. Smell strongest after water sits, like overnight, suggests bacterial activity inside the tank.
Fixes
- Replace the anode rod. This is one of the best life extending repairs. Different anodes exist, magnesium, aluminum, and powered anodes. A plumber can select one that suits odor control and water chemistry.
- Tank flush. Flushing reduces sediment that harbors bacteria and discolors water.
- Disinfection treatment. Under professional guidance, the tank can be disinfected. In stubborn odor cases, a powered anode rod often reduces smell without repeated chemical treatments.
- Inspect for internal corrosion. If rust returns quickly after treatment or you see rust at the hot outlet, the tank lining may be failing.
Maintenance prevention
- Inspect and replace anode rods every 2 to 5 years depending on water conditions and usage.
- Keep temperature at safe levels, extremely low temps can encourage bacterial growth, but do not raise temps without scald protection.
Replacement guidance
- If rust and sediment are severe and the unit is near typical lifespan, replacement is often the best choice, because tank failure can follow.
- Consider upgrading to a unit with better warranty and easier anode access, plus add water treatment if your water is aggressive or high in sulfur.
5) Leaking water heater or pooling water around the tank
Any water around the heater should be treated as urgent. Some leaks are simple fixes, like a loose connection or a failing valve, but others mean the tank itself has corroded and must be replaced.
- Common causes
- Loose inlet or outlet connections
- Failed temperature and pressure relief valve
- Leaking drain valve
- Condensation from cold water entering a warm tank or humid room
- Tank corrosion and rupture, usually a replacement situation
- Heat pump condensate drain blockage
What you can check
- Find the source. Dry the area, then look at the top fittings, relief valve discharge pipe, drain valve, and tank seams.
- Check the relief valve discharge. If water is dripping from the discharge pipe, the relief valve may be relieving pressure or temperature, or it may be faulty.
- Inspect for condensation. Wiping the tank, if it sweats uniformly and stops after the first few heating cycles, it may be condensation rather than a leak.
Fixes
- Tighten and reseal fittings. A plumber may rework threaded connections with proper sealant and replace deteriorated flexible connectors.
- Replace relief valve. If the TPR valve is leaking and pressure and temperature are normal, replacement may solve it. If pressure is high, the root cause must be fixed first.
- Replace drain valve. A leaking plastic drain valve can often be replaced with a brass valve during a service visit.
- Repair or replace condensate line, heat pump. Clear blockages and verify proper slope and trap configuration.
- Tank seam leak. If the tank body is leaking, replacement is the only safe option.
Maintenance prevention
- Test the TPR valve annually, do it carefully, and stop if it will not reseat. Many homeowners prefer having a plumber perform and document this safety test.
- Install a leak pan and drain where allowed, especially in finished spaces, plus a water alarm sensor.
Replacement guidance
- Replace immediately if the tank itself is leaking. Waiting risks property damage and sudden failure.
- If you are replacing due to a leak, consider adding an expansion tank if your system is closed, and confirm a pressure regulating valve if incoming pressure is high.
6) Relief valve keeps dripping, pressure problems, or expansion issues
A dripping TPR valve is not just a nuisance, it is a warning sign. The valve opens to prevent dangerous pressure or temperature. The correct response is to diagnose pressure and expansion, not to plug the pipe.
- Common causes
- Water pressure too high, often above 80 psi
- Thermal expansion in a closed plumbing system
- Faulty or scaled relief valve
- Overheating from a failed thermostat or gas valve
What you can check
- Measure water pressure. Use a hose bib pressure gauge on an exterior spigot or laundry faucet. Check static pressure and consider a gauge with a red max needle to capture pressure spikes.
- Look for a check valve or backflow. Many homes have a pressure reducing valve or backflow device that creates a closed system, which makes expansion tanks important.
Fixes
- Install or service an expansion tank. If thermal expansion is the cause, a properly sized and precharged expansion tank can stop the drip and protect fixtures.
- Adjust or replace pressure reducing valve. If the incoming pressure is excessive, a PRV can be adjusted or replaced.
- Replace the relief valve. Only after confirming pressure and temperature are normal. Always use a correctly rated valve.
- Correct overheating. If water is excessively hot and the relief valve opens, treat it as urgent and shut down the heater until controls are repaired.
Maintenance prevention
- Check home water pressure yearly, pressure problems affect appliances, hoses, and valves throughout the building.
- Have expansion tank air charge verified during annual water heater service.
Replacement guidance
- If the heater is near end of life and expansion issues have been stressing the tank, replacement plus correcting expansion and pressure is usually the best long term fix.
7) Strange noises, popping, rumbling, or banging
Water heaters are not silent, but loud popping or rumbling often points to sediment. In gas units, sediment can trap water under it, creating steam bubbles that pop. In electric units, scale can accumulate on elements and cause sizzling or ticking.
- Common causes
- Heavy sediment buildup in the tank
- Scale on heating elements
- Water hammer in plumbing lines, not the heater itself
- Loose burner components or draft issues, gas
What you can check
- When does the noise happen. If it happens during heating cycles, suspect sediment or scale. If it happens when faucets close quickly, suspect water hammer.
- Check for water hammer arrestors. Washing machines and dishwashers can cause banging if supply lines are not protected.
Fixes
- Flush the tank. For moderate sediment, flushing can reduce noise. For severe buildup, a professional may need to power flush or remove and replace parts.
- Descale or replace elements. Electric elements with heavy scale may need replacement.
- Address water hammer. Secure loose pipes, add hammer arrestors, and verify pressure is not too high.
- Gas burner inspection. Ensure correct combustion and burner alignment, a technician can clean and tune the burner.
Maintenance prevention
- Perform regular sediment flushing, especially with hard water or older plumbing.
- Maintain pressure at safe levels and add arrestors where quick closing valves exist.
Replacement guidance
- If severe sediment has hardened and the heater is aging, replacement can be more predictable than repeated flushing attempts, and it may restore efficiency significantly.
8) Pilot light will not stay lit, ignition and burner issues
Gas water heaters and gas tankless units rely on reliable ignition and stable flame. A pilot that goes out repeatedly can signal a dirty pilot assembly, failing thermocouple, air supply issues, or venting problems.
- Common causes
- Dirty pilot orifice or burner
- Weak thermocouple or faulty flame sensor
- Drafts or negative pressure in the room
- Blocked vent or improper venting
- Gas control valve failure
- Condensation dripping onto burner area, common during cold startup
What you can check
- Look for lint and dust. Utility rooms and garages collect dust, which can clog air intake screens or burner compartments.
- Check combustion air. A tight closet or blocked louvers can starve the heater of air.
- Observe error indicators. Some gas valves flash codes through an LED or view window that indicate the fault category.
Fixes
- Clean air intake and burner area. Turn off gas, then gently vacuum around the base and screens. Do not disassemble gas components unless qualified.
- Replace thermocouple or pilot assembly. Common repair for older heaters with standing pilots.
- Correct venting problems. A professional should inspect vent sizing, pitch, connections, and draft. Poor venting is a safety hazard.
- Verify gas supply. Low gas pressure or an undersized line can cause ignition issues, especially after appliance upgrades.
Maintenance prevention
- Keep the area around the heater clean and clear, avoid storing paint, chemicals, or dusty items nearby.
- Schedule periodic combustion safety checks for gas equipment.
Replacement guidance
- If a gas heater has repeated ignition failures and is mid to late life, replacement with a sealed combustion model can improve reliability and safety.
9) Slow recovery time and high energy bills
When the heater takes longer to reheat or your energy costs rise, the problem is often efficiency related. The heater may still work, but it is working harder than it should.
- Common causes
- Sediment insulating the tank bottom, gas
- Scale on heating elements, electric
- Thermostat drift causing overheating or longer runtimes
- Failing elements, one element partially working
- Heat loss due to missing pipe insulation or damaged tank insulation
- Recirculation pump running too much or check valve failed
- Tankless scale buildup reducing efficiency and flow
What you can check
- Compare monthly energy use. Look at utility bills and typical consumption patterns.
- Check for hot water circulation issues. Feel the hot water pipe, if it is hot when no hot water is being used, a recirculation system may be running continuously or thermosiphoning.
- Inspect insulation. Look for missing insulation on the first few feet of hot and cold piping and check that access panels are properly replaced on electric units.
Fixes
- Flush and descale. Removing sediment and scale restores heat transfer.
- Replace worn parts. New elements, thermostats, or burner components can restore recovery and reduce runtime.
- Insulate smartly. Insulate hot water pipes, and consider a tank blanket only if the manufacturer allows it and it does not cover controls or safety labels.
- Optimize recirculation. Use a timer, aquastat, or demand control, and verify check valves to prevent unwanted flow.
Maintenance prevention
- Annual inspection and flush, plus tankless descaling on schedule, often pays for itself in efficiency and reduced breakdowns.
- Keep the thermostat at an efficient, safe setpoint, typically 120 F, unless your application requires more with mixing protection.
Replacement guidance
- If your heater is older and efficiency has noticeably declined, upgrading to a high efficiency model, heat pump water heater, or properly sized tankless can reduce operating cost.
- For commercial applications with continuous demand, consider multiple heaters in staging, or a dedicated boiler or indirect water heating system depending on building design.
10) Age, corrosion, frequent repairs, and deciding when to replace
At some point, the best fix is replacement. Waiting too long can lead to a sudden tank rupture, property damage, and emergency downtime for businesses. A planned replacement lets you choose the best unit, schedule installation, and often improve efficiency.
- Common end of life signs
- Unit age exceeds typical lifespan, many tanks last 8 to 12 years, some longer with maintenance and favorable water conditions
- Visible rust on the tank, persistent rusty hot water
- Moisture at the base or tank seam
- Repeated repairs, elements, gas valve, leaks, burner issues
- Major sediment issues causing noise and poor performance
- Undersized heater that cannot meet demand even after service
Replacement planning checklist
- Confirm capacity needs. For tank units, consider first hour rating, not only gallons. For tankless, consider required gallons per minute at your incoming water temperature.
- Choose fuel and technology. Gas tank, electric tank, heat pump, or tankless based on budget, space, venting, electrical capacity, and energy goals.
- Evaluate venting and air supply. Upgrading to high efficiency gas may require different vent materials and routing.
- Plan for code upgrades. New installs may require thermal expansion control, seismic strapping in some regions, drain pans, shutoff valves, or bonding requirements.
- Consider water quality. Hard water and aggressive water shorten lifespan. Pair replacement with treatment or filtration when appropriate.
- Add protection. Leak alarms, automatic shutoff valves, and proper drain pans help prevent water damage.
Repair or replace, a practical rule of thumb
- Repair makes sense when the tank is in good condition, the unit is relatively young, and the fix is limited to serviceable parts like elements, thermostats, pilot assemblies, or valves, and there is no tank corrosion leakage.
- Replace makes sense when the tank is leaking, corrosion is advanced, efficiency is poor, parts are expensive or backordered, or the heater is near end of service life and has multiple issues.
Water heater maintenance schedule, simple but effective
Preventive maintenance reduces emergency calls and extends equipment life. This routine applies to most tank systems, and parts of it apply to tankless and heat pump models too.
- Monthly or quarterly
- Look for leaks at plumbing connections, valves, and around the base.
- Listen for new noises, popping or rumbling.
- Drain a few gallons from the tank to reduce sediment if your water is prone to buildup.
- Every 6 to 12 months
- Test home water pressure, confirm it stays in a safe range and does not spike.
- Flush the tank more thoroughly if sediment is present.
- Inspect venting and combustion area for gas models, check for soot, rust, or loose connections.
- Clean heat pump air filter and ensure condensate drain is clear, for heat pump units.
- Every 1 to 2 years
- Schedule professional inspection for gas safety, draft, and burner performance.
- Descale tankless units based on hardness, many need annual service.
- Every 2 to 5 years
- Inspect and replace the anode rod as needed, the interval depends heavily on water chemistry and usage.
Troubleshooting tips that save time during a service call
- Write down symptoms clearly. For example, hot water runs out in 7 minutes, or only lukewarm at one bathroom.
- Note timing. Does it happen only in the morning, or after laundry, or after the unit has been idle.
- Look for patterns in fixtures. One shower only suggests a mixing valve or cartridge issue, whole house issues suggest the heater or main plumbing.
- Record model and serial number. A photo of the rating plate helps identify parts and warranty status.
- Check water quality clues. White scale on fixtures, frequent clogged aerators, or known hard water often predicts sediment and scale problems.
When to call Rakeman Plumbing
- Any active leak from the tank body or water near electrical components
- Relief valve discharge that will not stop after pressure and temperature checks
- Gas odors, soot, venting concerns, or repeated pilot outages
- No hot water with a tripping breaker or signs of burned wiring
- Tankless error codes that repeat after filter cleaning and reset
- Planning a proactive replacement, including sizing guidance and code compliant installation
Bottom line
Most water heater problems fall into a few categories, heat source issues, controls and sensors, sediment and scale, pressure and expansion, and corrosion. Early troubleshooting and routine maintenance can prevent many failures, and a planned replacement can save money and avoid emergency water damage. If you want fast response and quality workmanship for repair, maintenance, or replacement, Rakeman Plumbing can help keep your hot water system safe, efficient, and reliable.